OREO Day of the Dead Cookies
Ingredients
- 3 OREO Cookies
- ¾ tsp. multi-colored sprinkles or nonpareils
Putting it together
- 1.
Twist top and bottom halves of each cookie in opposite directions to separate the cookie halves, leaving all the creme on one half of each cookie.
- 2.
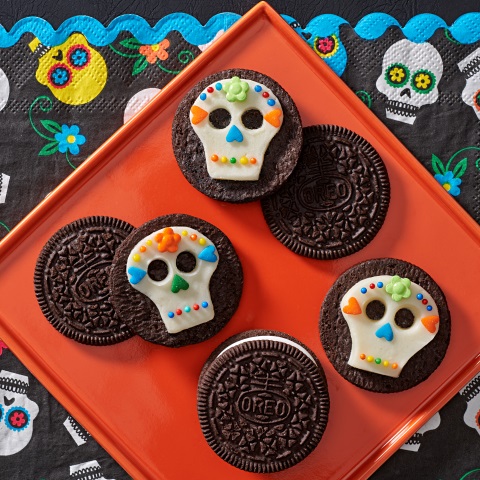
Carve out the creme into a skull shape as shown in photo using small metal spatula, toothpick or wooden skewer, carefully removing and discarding the creme from around the skulls.
- 3.
Use toothpick to carve out 2 small holes in the creme filling in each skull for the eyes. Discard the removed creme filling.
- 4.
Decorate the skulls with sprinkles or nonpareils as shown in photo, gently pressing decorations into creme to secure.
Tips and Tricks
Twist the cookie apart gently in a back-and-forth motion to release one cookie half from the creme filling. Or, you can use the tip of a small small metal spatula to scrape the creme close to one half of the cookie. Any creme remaining on the plain cookie half can be spread onto the creme-topped cookie half.
Use a toothpick dipped into assorted gel food colors to add special designs to your OREO Day of the Dead Cookie. For best results, you will need to dip the toothpick into the gel food color each time you want to add a dot of color to the creme filling.
Use small round black candies to make the eyes and/or add heart- or flower-shaped sprinkles for the nose and mouth.
Prepare using your favorite variety of OREO Cookies.